Your Ultimate Guide to Semi Trailer RV Conversion: Building Your Dream Mobile Home
Your Ultimate Guide to Semi Trailer RV Conversion: Building Your Dream Mobile Home Typestruck.Guidemechanic.com
Have you ever dreamt of a truly unique, spacious, and customizable mobile living space that goes beyond the typical RV? Imagine a home on wheels that reflects your personality, built exactly to your specifications, and capable of taking you on grand adventures. This isn’t just a pipe dream; it’s entirely possible with a semi trailer RV conversion.
Converting a semi trailer into a functional and comfortable RV is an ambitious project, but one that offers unparalleled rewards. It’s a journey from a utilitarian cargo hauler to a bespoke sanctuary, offering a level of space, durability, and customization rarely found in traditional recreational vehicles. As an expert in unique mobile living solutions, I’m here to guide you through every critical step, from initial planning to the final touches, ensuring your semi trailer RV conversion is a success story.
Your Ultimate Guide to Semi Trailer RV Conversion: Building Your Dream Mobile Home
Why Choose a Semi Trailer for RV Conversion? The Undeniable Advantages
Embarking on a semi trailer RV conversion might seem unconventional, but it comes with a host of compelling benefits that attract a growing community of DIY enthusiasts and full-time travelers. The sheer scale and robust construction of these vehicles provide a fantastic foundation for a truly personalized mobile abode. Let’s delve into why this path might be perfect for you.
Unmatched Space and Customization Potential
One of the most significant draws of a semi trailer RV conversion is the incredible amount of interior space it offers. Unlike traditional RVs with their predetermined layouts and often cramped quarters, a semi trailer provides a vast, open canvas. You’re essentially starting with a blank box, allowing you to design your floor plan from scratch.
This freedom means you can incorporate full-sized appliances, create distinct living zones, or even include dedicated workspaces that would be impossible in smaller RVs. Based on my experience with various mobile builds, this expansive footprint is a game-changer for those seeking long-term comfort and functionality on the road. You can truly build a home, not just a temporary living space.
Superior Durability and Robust Construction
Semi trailers are engineered to withstand millions of miles of heavy hauling under demanding conditions. This inherent durability translates directly into a incredibly robust platform for your RV. The chassis and frame are built for strength, meaning your converted RV will be far more resilient to the stresses of travel than many lighter-weight recreational vehicles.
This robust construction also provides an excellent foundation for secure mounting of heavy amenities like large water tanks, solar arrays, and robust climate control systems. You won’t have to worry as much about structural integrity when adding your desired features, giving you peace of mind during your travels.
Potential for Cost-Effectiveness (With Smart Planning)
While the initial outlay for materials can be substantial, a semi trailer RV conversion can be surprisingly cost-effective compared to purchasing a new, similarly sized luxury RV or custom-built tiny home on wheels. The cost of a used semi trailer itself can be significantly less than a comparable motorhome or fifth wheel.
The savings come primarily from the DIY aspect of the build, where your labor replaces expensive professional services. Pro tips from us suggest that sourcing used or reclaimed materials, and being strategic about your system installations, can further reduce expenses without compromising quality. However, it requires careful budgeting and a realistic understanding of potential costs.
A Unique Statement and Lifestyle Choice
Perhaps one of the most exciting aspects of a semi trailer RV conversion is the uniqueness it offers. Your converted trailer will stand out from the crowd, reflecting your personal style and ingenuity. It’s more than just a vehicle; it’s a conversation starter, a testament to your vision and effort.
This distinctive mobile home supports a wide range of lifestyles, from full-time nomadic living to a comfortable base camp for adventurers. For many, the appeal lies in creating something truly bespoke, a space that perfectly suits their individual needs and desires for freedom on the open road.
The Challenges and Critical Considerations: Before You Begin
While the allure of a semi trailer RV conversion is strong, it’s crucial to approach this project with a clear understanding of the challenges involved. This isn’t a weekend project; it demands significant time, effort, resources, and a good dose of problem-solving skills. Ignoring these aspects upfront can lead to costly delays or even abandonment.
Navigating Permits, Legalities, and Registration
One of the most complex hurdles in converting a semi trailer into an RV is navigating the legal landscape. Vehicle classifications vary by state and country, and registering a homemade RV can be tricky. You’ll need to understand if your converted trailer will be classified as a recreational vehicle, a homemade trailer, or something else entirely.
Common mistakes to avoid are neglecting to research your local Department of Motor Vehicles (DMV) requirements before you start building. This includes understanding weight limits, brake requirements, lighting standards, and potential inspection processes. It’s wise to consult with your state’s DMV early on to ensure your build will comply with all necessary regulations for road legality.
Weight, Towing Requirements, and Infrastructure
A semi trailer, even empty, is a substantial piece of equipment. Once you add insulation, framing, appliances, water tanks, and all your personal belongings, the weight can quickly escalate. This means you’ll need a robust towing vehicle, typically a heavy-duty pickup truck (like a dually) or even a semi truck cab, capable of safely hauling thousands of pounds.
Beyond towing, consider the implications of its size on infrastructure. Parking, navigating tight turns, and accessing certain campsites or urban areas might be more challenging than with a smaller RV. You’ll need to factor in the sheer footprint of your converted trailer when planning your travels and potential living locations.
Initial Condition of the Trailer and Hidden Costs
The purchase price of a used semi trailer can be attractive, but the condition of the trailer is paramount. Rust, damaged flooring, worn tires, faulty brakes, or structural issues can turn a bargain into a money pit. A thorough inspection is non-negotiable before purchase.
Based on my experience, it’s easy to underestimate the cost of repairs and preparation. Even seemingly minor issues can add up. Factor in expenses for tire replacement, brake service, lighting repairs, and any necessary structural reinforcement. Don’t let the initial low price blind you to potential hidden maintenance costs.
The Complexity of the Build and Required Skill Sets
A semi trailer RV conversion is a multi-disciplinary project requiring a broad range of skills. You’ll likely need to tackle carpentry, plumbing, electrical wiring, welding (for structural modifications), insulation, and general construction. If you lack experience in any of these areas, you’ll either need to learn quickly, hire professionals, or seek guidance.
This complexity means the project will be time-consuming, often spanning many months, if not years, for a comprehensive build. Be realistic about your own capabilities, available time, and access to tools and resources. It’s a marathon, not a sprint, and patience is a virtue here.
Phase 1: Planning and Design – Laying the Foundation for Success
The success of your semi trailer RV conversion hinges significantly on the meticulous planning and design phase. Skimping on this stage can lead to costly mistakes, inefficiencies, and ultimately, a less functional or enjoyable living space. This is where your vision truly begins to take shape.
Realistic Budgeting: Understanding the Financial Investment
Before you even think about swinging a hammer, create a detailed budget. This isn’t just about the cost of the trailer itself; it encompasses every single expense from acquisition to the final decorative touches. Pro tips from us suggest breaking down your budget into categories: trailer purchase, structural modifications (windows, doors), insulation, flooring, framing, electrical system, plumbing system, HVAC, kitchen appliances, bathroom fixtures, interior finishes, tools, and contingency funds.
Remember to allocate a significant portion for unexpected costs – a contingency fund of 15-20% is highly recommended. Common mistakes to avoid include underestimating material costs, not accounting for tool rentals or purchases, and forgetting about registration, insurance, and potential inspection fees. A thorough budget will save you headaches and financial strain down the line.
Crafting Your Ideal Floor Plan: Maximizing Every Square Foot
With the vast space of a semi trailer, designing an effective floor plan is both exciting and critical. Start by sketching out different layouts, considering how you’ll move through the space and the primary functions of each area. Think about distinct zones: sleeping area, kitchen, bathroom, living room, and perhaps a dedicated workspace.
Consider natural light and ventilation, positioning windows and doors strategically. Factor in the placement of heavy items like water tanks and batteries to ensure balanced weight distribution. Using masking tape on the trailer floor to outline your plan can give you a tangible sense of the space before you commit to building. This visual representation helps catch design flaws early.
Strategic Material Selection: Durability, Weight, and Insulation
The materials you choose will impact the longevity, weight, and energy efficiency of your converted RV. For structural elements like framing, consider lightweight but strong options like steel studs or aluminum, though wood framing is more common and easier for DIYers. For flooring, prioritize durable, water-resistant options that can withstand temperature fluctuations.
Insulation is paramount for comfort in varying climates. Research different types, such as rigid foam board, spray foam, or mineral wool, considering their R-value, ease of installation, and cost. Each material has its pros and cons regarding thermal performance, moisture resistance, and weight. Making informed choices here will significantly impact your living experience.
Phase 2: The Core Conversion Steps – Transforming the Shell
Once your planning is complete, it’s time to get hands-on and start transforming the semi trailer shell into the beginnings of your dream RV. This phase involves heavy-duty work, laying the groundwork for all the comforts to come.
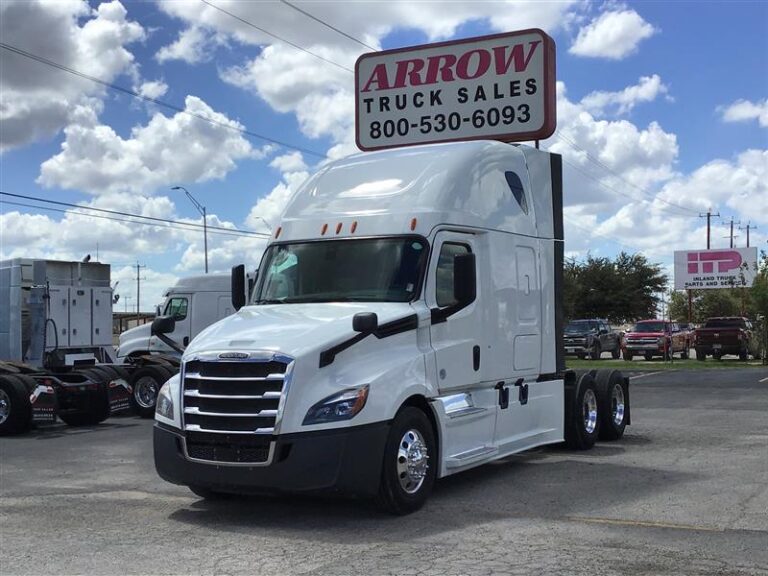
Acquiring Your Trailer: Inspection and Purchase
The first physical step is securing your semi trailer. Dry vans are common, but refrigerated (reefer) trailers offer superior insulation from the start, albeit at a higher initial cost and potential for interior cleaning challenges. When inspecting, look for signs of structural damage, severe rust on the frame, compromised roof integrity, and floor damage.
Check the condition of the tires, brakes, and lights. Ask for maintenance records if available. Pro tips from us suggest hiring a professional trailer mechanic for a pre-purchase inspection if you’re not confident in your own assessment. Negotiate based on any identified issues to ensure you’re getting a fair deal.
Thorough Cleaning and Initial Preparation
Before any construction begins, the trailer needs a deep clean. Remove all debris, sweep thoroughly, and pressure wash the interior. Address any mold, mildew, or lingering odors from previous cargo. This is also the time to treat any surface rust on the frame or interior panels to prevent further corrosion.
Repair any minor damage to the walls or floor. This preparatory work is crucial for ensuring a clean, stable, and healthy environment for your build. Skipping this step can lead to problems later with adhesion of materials, lingering smells, or structural issues.
Structural Modifications: Windows, Doors, and Skylights
This is often the most intimidating but rewarding part of the conversion. Carefully mark out the locations for all new openings: windows, doors, and potential skylights or roof vents. Measure multiple times before cutting. Using appropriate metal-cutting tools (e.g., plasma cutter, angle grinder with metal cutting discs, jigsaw with metal blades) is essential.
Once cuts are made, reinforce the new openings with sturdy framing to maintain structural integrity and provide solid mounting points for your windows and doors. Based on my experience, proper sealing around these openings is critical to prevent leaks and drafts, so invest in high-quality sealants and flashing.
The Insulation Imperative: Achieving Thermal Comfort
Effective insulation is arguably one of the most important aspects of your semi trailer RV conversion. Without it, your living space will be a freezer in winter and an oven in summer, leading to high energy consumption and discomfort. You’ll need to insulate the floor, walls, and ceiling.
Rigid foam boards (like XPS or polyiso) are popular for their high R-value and ease of installation, often cut to fit between studs. Spray foam offers excellent thermal breaks and air sealing but requires professional application or specialized equipment. Mineral wool provides good sound dampening in addition to thermal insulation. The goal is to create a continuous thermal envelope, minimizing thermal bridges where heat can escape or enter.
Subfloor and Finished Flooring Installation
With the insulation in place, it’s time for the floor. A robust subfloor is essential, typically constructed from plywood or OSB, securely fastened to the trailer’s existing crossmembers or a newly built floor frame. Ensure the subfloor is level and sealed against moisture.
For the finished flooring, consider options that are durable, easy to clean, and suitable for a mobile environment. Vinyl plank flooring, laminate, or engineered wood are popular choices due to their resilience to temperature changes and moisture. Avoid materials that are too heavy or prone to cracking with vibration.
Framing Your Interior Walls and Partitions
Once the subfloor is down, you can begin framing out your interior walls and partitions according to your floor plan. This defines the separate rooms and functional areas of your RV. You can use traditional wood studs (2×2 or 2×4), or lighter materials like aluminum or steel studs, depending on your weight considerations and desired structural strength.
Ensure all framing is securely attached to the trailer’s walls, ceiling, and floor. This provides the backbone for mounting cabinetry, appliances, and finishing materials. Accuracy in framing is key, as it impacts the fit and finish of everything that comes next.
Phase 3: Essential Systems – The Heart of Your RV
With the shell taking shape, it’s time to install the critical systems that will make your semi trailer a truly self-sufficient and comfortable RV. These are complex but foundational elements.
The Electrical System: Powering Your Mobile Life
A well-designed electrical system is vital for modern RV living. This typically involves a 12V DC system for lights, pumps, and USB charging, and a 120V AC system for larger appliances like microwaves, refrigerators, and outlets. You’ll need to plan for shore power hookups, a robust battery bank (lithium-ion is increasingly popular), an inverter/charger, and potentially solar panels for off-grid capabilities.
Safety is paramount here. All wiring must be properly sized, protected with fuses and circuit breakers, and installed according to electrical codes. If you’re not an experienced electrician, Pro tips from us highly recommend consulting or hiring a certified professional for this stage. For reliable information on safe electrical practices, resources like the National Electrical Code (NEC) or specific RV electrical guides from reputable sources are invaluable. . Common mistakes to avoid include undersizing wires, neglecting proper grounding, and not using appropriate overcurrent protection.
The Plumbing System: Fresh Water and Waste Management
Your plumbing system will consist of fresh water storage, a water pump, a water heater, and separate tanks for grey water (from sinks and showers) and black water (from the toilet). Plan the layout to minimize long pipe runs and ensure easy access for maintenance.
Consider the capacity of your tanks based on your travel style and water usage. Installing a macerating toilet or composting toilet can simplify your black water system. Ensure all pipes are properly secured and insulated, especially in colder climates, to prevent freezing. Proper venting for all tanks is also critical for efficient drainage.
HVAC: Climate Control for All Seasons
Maintaining a comfortable interior temperature is crucial. For heating, options include propane furnaces, diesel heaters, or electric space heaters. Diesel heaters are popular for their efficiency and use of readily available fuel. For cooling, roof-mounted RV air conditioners or mini-split units are common.
Ensure adequate ventilation with exhaust fans, especially in the kitchen and bathroom, to manage humidity and odors. Proper insulation significantly reduces the workload on your HVAC system, making it more efficient and cost-effective to heat and cool your space.
Crafting Your Kitchen and Bathroom Spaces
These are often the most complex areas due to the integration of plumbing, electrical, and cabinetry. For the kitchen, think about your cooking habits. Will you need a full-sized stove and oven, or will a portable induction cooktop suffice? Integrate a refrigerator, sink, and ample counter space.
For the bathroom, consider space-saving solutions like wet baths (where the entire bathroom acts as a shower stall). Choose marine-grade fixtures that are durable and designed for mobile applications. Ventilation in both areas is critical to prevent moisture buildup and maintain air quality.
Phase 4: Interior Finishing and Personalization – Making It Home
This is where your semi trailer truly transforms into a living space, reflecting your style and providing comfort. These details make all the difference.
Walls and Ceilings: Aesthetics and Practicality
Choose materials for your interior walls and ceilings that are durable, lightweight, and aesthetically pleasing. Plywood, tongue-and-groove planks, or lightweight composite panels are popular choices. Consider painting or staining to brighten the space and add character.
Ensure all panels are securely fastened and sealed to prevent rattling during travel. For ceilings, lighter colors can make the space feel more open and airy, while incorporating LED lighting can create a warm and inviting ambiance.
Cabinetry and Storage: Maximizing Every Nook
With the generous space, you have the opportunity for extensive storage. Custom-built cabinetry allows you to maximize every inch, fitting perfectly into your unique layout. Consider lightweight materials for cabinets to keep overall weight down.
Think about smart storage solutions: under-bed drawers, overhead cabinets, pantry pull-outs, and multi-functional furniture. Good organization is key to maintaining a tidy and functional living space in any RV.
Furniture and Decor: Comfort and Personal Touch
Select furniture that is comfortable, durable, and ideally, multi-functional. Convertible sofas, dining tables that fold down, or benches with built-in storage are excellent choices for mobile living. Anchor all heavy furniture securely to the floor or walls to prevent movement during travel.
This is the phase to infuse your personality into the space with decor, textiles, and personal items. Lighting, curtains, rugs, and artwork can transform the raw interior into a cozy and inviting home.
Legality, Safety, and Ongoing Maintenance: Essential Considerations
Even after your build is complete, your journey isn’t over. Ensuring your converted RV is legal, safe, and well-maintained is crucial for enjoyable and worry-free travels.
Registration and Insurance for Your Unique RV
As mentioned earlier, registering a homemade RV can be complex. You’ll likely need to provide documentation of the conversion process, weigh the vehicle, and potentially undergo an inspection. Many states have a "homemade" or "custom-built" vehicle classification. Once registered, obtaining RV insurance is vital. Some insurers specialize in custom builds; shop around to find comprehensive coverage that understands the unique nature of your semi trailer RV.
For more details on navigating the complexities of RV registration and insurance, check out our in-depth guide on .
Prioritizing Safety Checks and Equipment
Safety should be a constant priority. Install smoke detectors, carbon monoxide detectors, and a fire extinguisher in easily accessible locations. Ensure all propane and electrical systems are professionally checked for leaks or faults. Secure all interior items to prevent them from becoming projectiles during sudden stops or accidents.
Regularly inspect your trailer’s brakes, tires, and lights, as these are critical for road safety. A semi trailer RV is a heavy vehicle, and proper maintenance of these components is non-negotiable for your safety and the safety of others on the road.
Ongoing Maintenance for Longevity
Like any vehicle or home, your semi trailer RV will require ongoing maintenance. This includes regular checks of your plumbing and electrical systems, servicing your HVAC units, inspecting the roof and seals for leaks, and maintaining the exterior of the trailer. Keeping up with routine maintenance will extend the life of your conversion and prevent costly repairs down the line.
Estimated Cost Breakdown: What to Expect
The cost of a semi trailer RV conversion can vary wildly depending on the trailer’s initial condition, your DIY skills, material choices, and the complexity of your desired systems. Here’s a rough breakdown:
- Used Semi Trailer: $5,000 – $25,000+ (depending on age, condition, type)
- Structural Modifications (Windows, Doors): $1,000 – $5,000+
- Insulation: $1,000 – $4,000+
- Framing & Subfloor: $500 – $2,000+
- Electrical System (Batteries, Solar, Inverter, Wiring): $3,000 – $15,000+
- Plumbing System (Tanks, Pump, Water Heater, Fixtures): $1,500 – $5,000+
- HVAC (Heating & Cooling): $1,000 – $5,000+
- Kitchen & Bathroom Appliances/Fixtures: $1,000 – $10,000+
- Interior Finishes (Walls, Ceilings, Flooring, Cabinetry): $2,000 – $10,000+
- Miscellaneous (Tools, Sealants, Fasteners, etc.): $1,000 – $3,000+
- Contingency (15-20%): Essential for unexpected expenses.
Total Estimated Cost: $18,000 – $84,000+
As you can see, this is a broad range. A minimalist, DIY-heavy build can be done for under $30,000, while a luxurious, feature-rich conversion with professional help could easily exceed $100,000. It truly depends on your vision and budget.
Inspiring Design Ideas: Unleash Your Creativity
The beauty of a semi trailer RV conversion lies in its boundless potential for creativity. Imagine a multi-level living space with a lofted bedroom, or a dedicated art studio with panoramic windows. Some builders create expansive open-concept living areas, while others opt for distinct rooms with traditional doors.
Consider incorporating unique features like a rooftop deck, a large garage area for ATVs or motorcycles, or even a sliding wall that expands your living space outdoors. The only limit is your imagination and the structural integrity of the trailer. Many online communities and forums showcase incredible semi trailer tiny home designs, offering a wealth of inspiration.
Your Adventure Awaits: Conclusion
A semi trailer RV conversion is more than just a building project; it’s an investment in a lifestyle of freedom, customization, and adventure. While it demands dedication, skill, and a significant commitment of time and resources, the reward is an unparalleled mobile living experience tailored precisely to your dreams.
By meticulously planning, carefully executing each phase, and prioritizing safety and maintenance, you can transform a simple cargo hauler into a magnificent, fully functional home on wheels. So, if the call of the open road combined with the desire for a truly unique dwelling resonates with you, it might be time to start sketching out your vision for a semi trailer RV conversion. Your ultimate mobile home is within reach!