Revitalize Your Ride: The Ultimate Guide to Box Van Replacement Panels
Revitalize Your Ride: The Ultimate Guide to Box Van Replacement Panels Typestruck.Guidemechanic.com
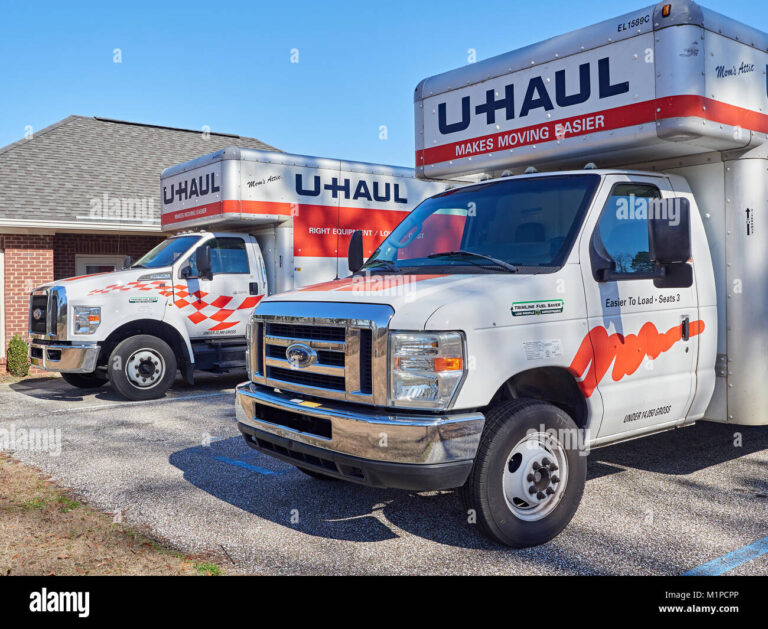
In the demanding world of commercial transportation, your box van is more than just a vehicle; it’s a vital asset, a mobile billboard, and often, the backbone of your business operations. Day in and day out, these workhorses endure countless miles, varying weather conditions, and the occasional bumps and scrapes that are an inevitable part of the job. Over time, this constant exposure leads to wear and tear, with one of the most visible and critical areas of concern being the exterior panels.
Damaged panels aren’t just an aesthetic problem; they compromise your van’s structural integrity, cargo security, and even your brand image. This is where Box Van Replacement Panels become indispensable. They offer a comprehensive solution to restore your vehicle’s functionality, safety, and professional appearance. In this ultimate guide, we’ll dive deep into everything you need to know about these essential components, from understanding different materials and the replacement process to making informed decisions that will extend the life and value of your commercial fleet. Get ready to transform your box van from worn-out to road-ready, ensuring it continues to serve your business effectively for years to come.
Revitalize Your Ride: The Ultimate Guide to Box Van Replacement Panels
Why Box Van Panel Replacement is Crucial for Your Business
Ignoring damaged panels on your box van is a costly oversight that can lead to a cascade of problems. Investing in timely replacement isn’t just about making your vehicle look good; it’s a strategic decision that safeguards your operations, finances, and reputation. Let’s explore the critical reasons why addressing panel damage promptly is non-negotiable.
Firstly, safety is paramount. Compromised panels, whether on the sides, roof, or front bulkhead, can weaken the entire structure of the box. This structural degradation puts both your cargo and other road users at risk. During transit, a weakened panel might flex excessively, leading to cargo shifts or, in severe cases, even panel detachment. Furthermore, in the event of an accident, a damaged panel offers less protection, potentially exacerbating injuries or further damaging the goods inside.
Beyond immediate safety, protecting your valuable cargo from the elements is a core function of your box van. A small crack or a poorly sealed seam can allow water, dust, and extreme temperatures to infiltrate the cargo area. This can lead to spoiled goods, damaged electronics, or compromised sensitive materials, resulting in significant financial losses and customer dissatisfaction. Properly installed Box Van Replacement Panels ensure a watertight and secure environment, keeping your payload safe and sound, regardless of the journey’s conditions.
Moreover, your box van acts as a mobile advertisement for your business. A dented, scratched, or corroded panel reflects poorly on your professionalism and attention to detail. Maintaining a pristine fleet projects an image of reliability and quality, reinforcing trust with your clients and enhancing your brand’s perception. In a competitive market, every detail counts, and a well-maintained vehicle speaks volumes about your commitment to excellence.
Finally, compliance and regulatory requirements often dictate the condition of commercial vehicles. Operating a van with significant structural damage could lead to fines, inspections, or even being taken off the road until repairs are made. Proactive panel replacement helps you stay compliant, avoiding costly downtime and legal complications. It also helps in maintaining the vehicle’s residual value, which is crucial for future resale or trade-in. Ignoring damage only depreciates your asset faster.
Understanding Your Box Van: The Anatomy of a Panel
To fully appreciate the importance of Box Van Replacement Panels, it’s essential to understand their role within the vehicle’s overall structure. A box van isn’t just a simple box; it’s a carefully engineered structure where each panel contributes to its strength, insulation, and cargo protection.
Typically, a box van body consists of several distinct panel sections. You have the side panels, which form the main walls of the cargo area. These are often the most visible and frequently damaged panels, bearing the brunt of scrapes and impacts. Above them, the roof panel provides critical protection from rain, sun, and falling debris, while also contributing to the structural rigidity of the entire box.
At the front, the front bulkhead panel separates the cargo area from the driver’s cab. This panel is crucial for driver safety, preventing cargo from shifting forward during sudden stops. Lastly, the rear door panels facilitate access to the cargo and are often reinforced to withstand repeated opening and closing, as well as potential impacts during loading and unloading.
The way these panels are constructed and joined varies significantly. Some box vans feature a monocoque design, where the panels themselves are integral load-bearing components. Others might have a separate frame onto which the panels are attached, acting more as cladding. Regardless of the specific design, each panel is designed to work in conjunction with its counterparts, creating a robust, weather-tight, and secure enclosure. Understanding this interplay helps in appreciating why a single damaged panel can compromise the integrity of the entire structure and why selecting the correct replacement is so vital.
Types of Box Van Replacement Panels: Materials Matter
When it comes to Box Van Replacement Panels, the material choice is perhaps the most critical decision. Each material offers distinct advantages and disadvantages in terms of weight, strength, durability, repairability, and cost. Understanding these differences will help you select the best panel for your specific operational needs and budget.
GRP (Glass Reinforced Plastic) / Fiberglass Panels
GRP, often referred to as fiberglass, is a composite material widely used in box van construction. It consists of glass fibers embedded in a resin matrix, creating a material that is both strong and lightweight.
- Pros: GRP panels are highly resistant to corrosion and rust, making them ideal for all weather conditions. They are relatively lightweight, which helps in maximizing payload capacity and improving fuel efficiency. Their smooth surface is excellent for branding and graphics, and they are generally easier to repair than metal panels, as small cracks can often be patched. GRP also offers good insulation properties, which is beneficial for temperature-sensitive cargo.
- Cons: While strong, GRP can be brittle under sharp, localized impacts, leading to cracks or punctures rather than dents. Over prolonged exposure to UV rays without proper protection, some older GRP panels might show signs of degradation, such as chalking or fading.
- Applications: GRP is a popular choice for a wide range of box vans, from general freight to refrigerated units and dry freight applications, where a balance of strength, weight, and corrosion resistance is needed.
Aluminum Panels
Aluminum is another popular material, especially for those prioritizing weight reduction and durability. It’s a non-ferrous metal known for its excellent strength-to-weight ratio.
- Pros: Aluminum panels are exceptionally lightweight, contributing significantly to increased payload capacity and better fuel economy. They boast excellent corrosion resistance, as aluminum naturally forms a protective oxide layer. Unlike steel, aluminum does not rust. It’s also a highly recyclable material, making it an environmentally friendly option.
- Cons: Aluminum can be more susceptible to denting and creasing upon impact compared to steel or GRP. Repairing aluminum panels typically requires specialized welding equipment and expertise, making repairs potentially more complex and costly. The initial cost of aluminum panels can also be higher than GRP or plywood options.
- Applications: Commonly found in premium box van builds, refrigerated trailers, and any application where minimizing vehicle weight is a top priority, such as urban delivery vehicles with strict weight limits.
Plywood / Laminated Panels
Often, box vans utilize panels constructed from plywood, sometimes faced with materials like GRP or aluminum for enhanced durability and aesthetics.
- Pros: Plywood-based panels are generally more cost-effective than pure GRP or aluminum. They offer good rigidity and can be relatively easy to work with during installation, especially for custom cuts. Laminated versions, particularly GRP-faced plywood, combine the strength and insulation of plywood with the weather resistance of GRP. They also provide excellent thermal insulation, making them suitable for insulated or refrigerated bodies.
- Cons: Plywood is heavier than GRP or aluminum, which can reduce payload capacity. It is also susceptible to water ingress and rot if seals fail or the facing material is compromised, leading to delamination and structural weakening over time.
- Applications: Often used in older box vans, internal linings, or for budget-conscious repairs where insulation properties are important. GRP-faced plywood is a popular choice for new builds seeking a balance of cost, strength, and insulation.
Steel Panels
While less common for the main skin of modern box vans due to weight, steel is still used in specific areas or for older designs.
- Pros: Steel is incredibly strong and durable, offering excellent impact resistance. It’s also a relatively inexpensive material.
- Cons: The primary drawback of steel is its weight, which significantly reduces payload capacity and fuel efficiency. It is also highly susceptible to rust and corrosion if not properly treated and maintained, leading to unsightly damage and structural compromise.
- Applications: More often found in the structural frame components, reinforcement sections, or for specific heavy-duty applications rather than the main exterior panels of modern box vans.
Pro tips from us: When choosing your Box Van Replacement Panels, always consider the original design specifications, your typical cargo, the routes you operate on, and your budget. Don’t just default to the cheapest option; think about the long-term benefits in terms of durability, maintenance, and operational efficiency. For instance, if you’re frequently navigating tight city streets, a more impact-resistant material might save you money on future repairs. If fuel efficiency is paramount, investing in lighter materials like aluminum or GRP can pay dividends.
When to Replace vs. Repair: Making the Smart Choice
Deciding whether to repair a damaged panel or opt for a full replacement is a critical decision that balances cost, safety, and long-term durability. It requires a careful assessment of the damage and an understanding of the material properties. Based on my experience, rushing this decision can lead to repeat issues or unnecessary expenses down the line.
Minor Scratches and Surface Dents: For superficial damage that hasn’t compromised the structural integrity of the panel, a repair is often the most cost-effective solution. This could involve sanding, filling, and repainting for GRP or aluminum panels, or minor dent removal for aluminum. These repairs are largely cosmetic but are important for maintaining your vehicle’s professional appearance and preventing minor damage from escalating.
Cracks and Punctures: This is where the decision becomes more nuanced. Small, localized cracks or punctures in GRP panels, especially those not near structural points, can often be effectively patched and reinforced. However, if the crack is extensive, runs along a seam, or shows signs of delamination (for laminated panels), replacement is usually the safer and more durable option. For aluminum panels, small punctures can sometimes be welded, but larger holes or tears typically necessitate replacement to maintain structural integrity and weatherproofing.
Structural Damage: Any damage that affects the panel’s ability to bear loads or maintain its shape is a clear indicator for replacement. This includes significant buckling, warping, or deep creases that compromise the panel’s rigidity. If the damage extends to the underlying frame or if multiple adjacent panels are affected, a full replacement of the compromised sections is essential to restore the van’s structural integrity and ensure cargo safety. Trying to "repair" structural damage often leads to weak points that will fail under stress.
Water Ingress or Delamination: For laminated panels (e.g., GRP-faced plywood), signs of water ingress, such as bubbling, soft spots, or delamination, almost always warrant replacement. Once water has penetrated the core, it can lead to rot, mold, and a complete breakdown of the panel’s structural and insulating properties. A repair in such cases would only be a temporary fix, as the internal damage would continue to spread.
Cost-Benefit Analysis: Beyond the type of damage, consider the age of the van and your long-term plans for it. For an older vehicle nearing the end of its service life, a less extensive repair might be justifiable. However, for a newer vehicle or one you plan to operate for many more years, investing in a full replacement, especially for significant damage, offers better value, peace of mind, and helps maintain the vehicle’s resale value. Pro tips from us: Always get a professional assessment. A reputable repair shop can accurately gauge the extent of the damage and recommend the most appropriate and cost-effective solution, whether it’s a repair or installing new Box Van Replacement Panels.
The Replacement Process: A Step-by-Step Overview
Replacing a box van panel is a significant undertaking that demands precision, the right tools, and an understanding of structural mechanics. While the specific steps can vary depending on the panel material and the van’s construction, the general process remains consistent. This overview will give you a clear picture of what’s involved.
1. Assessment and Planning
The first crucial step is a thorough assessment of the damage and careful planning. This involves identifying all affected panels, measuring the dimensions accurately, and determining the correct material and specifications for the replacement panels. It’s vital to order panels that match the original equipment manufacturer (OEM) specifications as closely as possible to ensure a perfect fit and maintain the van’s structural integrity. Any associated components, like internal linings, trim, or lights, that need to be removed or replaced should also be identified at this stage.
2. Preparation: Removing the Old Panel
Once the new panels are sourced, the old, damaged panel must be carefully removed. This process often involves:
- Disconnection: Any attached wiring, lights, or interior fixtures on or near the panel must be safely disconnected and secured.
- De-riveting/Unbolting: Many box van panels are attached using rivets or bolts. These need to be carefully drilled out or unfastened without damaging the underlying frame.
- Cutting Adhesives/Sealants: Modern box vans frequently use strong structural adhesives and sealants to bond panels. Specialized cutting tools, such as oscillating multi-tools or wire cutters, are used to separate the old panel from the frame and adjacent panels. This requires a steady hand and knowledge of where the adhesives are located to avoid damaging the frame.
- Cleaning and Inspection: After the old panel is removed, the exposed frame and surrounding areas must be meticulously cleaned. All old adhesive, sealant, and debris must be removed to create a pristine surface for the new panel. This is also the opportune moment to inspect the underlying frame for any hidden damage, corrosion, or deformation that might have occurred. Any such issues must be addressed before proceeding with the new installation.
3. Installation of New Box Van Replacement Panels
The installation of the new panel is where precision and proper technique are paramount. There are generally three main methods of attachment, often used in combination:
- Adhesive Bonding: This is increasingly common in modern box van construction, offering superior strength, weatherproofing, and a smooth finish. High-strength structural adhesives are applied to the frame and contact points of the new panel. The panel is then carefully positioned and clamped, allowing the adhesive to cure fully. This method creates a seamless, durable bond that distributes stress evenly across the panel.
- Riveting: A traditional and robust method, riveting involves drilling holes through the new panel and the frame, then securing them with specialized rivets. This is particularly common for GRP and aluminum panels. Proper rivet size, type, and spacing are crucial for ensuring a strong, lasting attachment.
- Bolting: While less common for large main panels, bolting is used for specific sections, access panels, or where future removal might be necessary. Bolts provide a strong, mechanical attachment and allow for adjustments.
4. Sealing and Finishing Touches
Once the new panel is securely in place, the work isn’t over. Sealing is absolutely critical for weatherproofing and preventing water ingress. High-quality, flexible sealants are applied along all seams and joints to create a watertight barrier. This step cannot be overlooked, as a poor seal can negate all the effort put into the panel replacement.
Finally, any removed interior linings, trim pieces, lights, or wiring are re-installed. If the panel was supplied unpainted, it will need to be prepped, primed, and painted to match the rest of the van. Any decals or branding elements are then applied to restore the vehicle’s professional appearance.
Common mistakes to avoid are:
- Inadequate surface preparation: Failing to thoroughly clean and prepare the bonding surfaces will lead to weak adhesion and premature failure.
- Improper adhesive application: Using the wrong type of adhesive, insufficient quantity, or incorrect curing procedures can compromise the structural integrity.
- Poor sealing: This is a major culprit for water damage. Ensure all seams are completely sealed with appropriate, durable sealants.
- Not checking alignment: A misaligned panel can affect door closures, overall aerodynamics, and put undue stress on other components.
- Ignoring underlying frame damage: Installing a new panel over a compromised frame is a recipe for disaster. Always inspect and repair the frame first.
Pro tips from us: For adhesive bonding, always consult the adhesive manufacturer’s specifications for application, cure times, and environmental conditions. You can find excellent resources and detailed technical data sheets from reputable adhesive suppliers like . Following these guidelines is paramount for a successful and durable repair.
DIY vs. Professional Installation: Weighing Your Options
When facing the need for Box Van Replacement Panels, one of the biggest decisions is whether to tackle the job yourself or entrust it to professionals. Both approaches have their merits and drawbacks, and the best choice depends heavily on the extent of the damage, your skill level, available tools, and your budget.
DIY Installation
For those with a strong mechanical aptitude, the right tools, and ample time, a DIY approach can be an appealing option.
- Pros: The most significant advantage of DIY is the potential for cost savings on labor. If you’re confident in your abilities, doing the work yourself can significantly reduce the overall expense. It also gives you complete control over the process and the materials used. For minor, non-structural panel replacements, such as a simple side panel on an older, less complex van, DIY might be feasible.
- Cons: Replacing box van panels is not a simple task. It requires specialized tools (e.g., rivet guns, adhesive cutters, clamps, proper sealing equipment), a deep understanding of structural integrity, and the correct application techniques for adhesives and sealants. There’s a significant learning curve and a high potential for errors, such as improper sealing leading to water ingress, misaligned panels, or compromised structural bonds. These errors can be costly to fix and may even lead to safety hazards. Furthermore, the time investment can be substantial, taking your vehicle off the road for longer than anticipated.
- Best for: Very minor repairs, cosmetic panel work where structural integrity is not a concern, or for individuals with extensive experience in vehicle bodywork and access to professional-grade tools.
Professional Installation
Entrusting your box van panel replacement to a reputable commercial vehicle body shop is often the preferred choice for most businesses.
- Pros: Professionals bring expertise and experience to the table. They have the specialized tools, knowledge of different materials and bonding techniques, and a trained eye to ensure the job is done correctly and safely. A professional repair typically comes with a warranty on both parts and labor, providing peace of mind. They can also ensure that the repair meets all safety and regulatory standards, and achieve a high-quality finish that restores your van’s appearance and value. For complex structural damage or specialized materials like aluminum or GRP, professional service is almost always recommended.
- Cons: The primary drawback of professional installation is the higher cost due to labor, specialized equipment, and overheads. However, this upfront investment often pays off in the long run by preventing future issues, ensuring safety, and maintaining the vehicle’s longevity.
- Best for: Major structural damage, complex panel materials (like advanced composites or specialty aluminum), situations where time is critical, or for businesses that prioritize quality, safety, and a professional finish.
Based on my experience: For anything beyond very minor cosmetic damage, I strongly recommend professional installation of Box Van Replacement Panels. The complexities of structural bonding, precise alignment, and effective weatherproofing are best left to those with dedicated training and equipment. The peace of mind and the assurance of a durable, safe repair often outweigh the initial cost savings of a DIY attempt. If you’re unsure where to start, you might find our guide on helpful for selecting a qualified service provider.
Sourcing Quality Box Van Replacement Panels
The success and longevity of your panel replacement project hinge significantly on the quality of the Box Van Replacement Panels you source. Skimping on quality here can lead to premature failure, fitment issues, and ultimately, more expenses down the road.
When looking for replacement panels, you’ll generally encounter two main categories:
- OEM (Original Equipment Manufacturer) Panels: These are panels manufactured by or for the original builder of your box van. They are designed to be an exact fit and match the original specifications in terms of material, thickness, and finish.
- Aftermarket Panels: These are manufactured by third-party companies. While often more affordable, the quality can vary widely. Some aftermarket manufacturers produce panels that meet or exceed OEM standards, while others may offer inferior products.
Reputable suppliers are your best bet. Look for specialist panel manufacturers or commercial vehicle parts dealers that have a proven track record. They can provide detailed specifications, material certifications, and often offer guidance on the best panel for your specific make and model.
It’s paramount to match the specifications precisely. This includes the panel’s material (GRP, aluminum, plywood), its thickness, and its exact dimensions. Even a slight variation in thickness can affect structural integrity and compatibility with existing seals or trim. If you’re dealing with insulated panels, ensure the replacement offers comparable thermal properties.
Sometimes, standard off-the-shelf panels might not fit unique or older box van models. In such cases, you might need to explore custom fabrication. Many specialist panel manufacturers can produce bespoke panels to your exact measurements and material requirements, ensuring a perfect fit where standard options fall short. Always request detailed drawings and material specifications for custom orders.
Maintenance Tips for Your Box Van Panels
Once your Box Van Replacement Panels are installed, proper maintenance is key to extending their lifespan and ensuring your investment pays off. A little proactive care goes a long way in preventing future damage and preserving your van’s appearance.
Firstly, regular cleaning is essential. Dirt, grime, road salt, and environmental pollutants can degrade panel surfaces, especially paintwork and sealants. Use appropriate vehicle cleaning solutions and soft brushes or cloths to avoid scratching the panels. Pay particular attention to areas where dirt tends to accumulate, such as wheel wells and lower panel sections.
Secondly, make it a habit to inspect your panels frequently. Look for any signs of damage, no matter how small. This includes minor scratches, dents, cracks, or chips. Also, check the integrity of all seals and joints, especially around doors, windows, and where panels meet the frame. Loose or cracked seals are common entry points for water, which can lead to more severe internal damage over time.
Thirdly, address minor issues promptly. A small crack in a GRP panel, if left unaddressed, can propagate and become a major structural problem. Similarly, a compromised sealant can quickly lead to water ingress. Early intervention, whether it’s a simple patch repair or re-sealing, can prevent minor issues from escalating into costly replacements.
Finally, consider protective coatings. For GRP panels, a good quality wax or sealant can provide an extra layer of UV protection, preventing fading and chalking. For painted surfaces, regular waxing or ceramic coatings can protect the paint from environmental damage and make cleaning easier. These measures help maintain the aesthetic appeal and structural integrity of your panels for longer.
Conclusion: Investing in the Longevity and Performance of Your Box Van
Your box van is a critical asset, and its condition directly impacts your business’s efficiency, safety, and public image. The decision to invest in high-quality Box Van Replacement Panels is more than just a repair; it’s a strategic investment in the longevity, safety, and operational excellence of your commercial vehicle fleet.
Throughout this comprehensive guide, we’ve explored the myriad reasons why timely panel replacement is crucial, from safeguarding cargo and ensuring driver safety to upholding your brand’s reputation and maintaining compliance. We’ve delved into the diverse world of panel materials, highlighting the unique properties of GRP, aluminum, and laminated options, and provided insights into when a full replacement outweighs a simple repair. Understanding the intricate replacement process and weighing the pros and cons of DIY versus professional installation empowers you to make informed decisions that serve your business best.
Remember, every mile your box van travels, it faces challenges that can compromise its integrity. By choosing the right replacement panels and ensuring their expert installation, you’re not just fixing a problem; you’re actively preserving the value of your asset, extending its service life, and guaranteeing that it continues to perform reliably and safely on every journey. Don’t delay addressing panel damage; invest wisely in your box van’s future, and it will continue to deliver for your business for years to come.